Pages

Tuesday, October 17, 2017

My Very First Keto Chili


I've made chili throughout my 22 year marriage, but I've never made it without beans.  Last week we attended an annual chili cook-off and were really inspired by a particular chili that didn't have a bean in sight.  I knew I could set out to make a Keto Chili that my hubby and I would love so much that we wouldn't miss the beans.  I nailed it!  We loved it!
Hope you like it too!  

In the past I would often add beer for added flavor but beer isn't keto so I grabbed some red wine that hubby was keeping in the refrigerator.  You don't have to add it, you could use balsamic vinegar instead, but my husband and I really loved the hint of wine flavor, it added a nice layer.

Ingredients:

2 pounds of organic grass fed ground beef
1-28 oz can of Petite Diced Tomatoes or (2) 15 oz cans
1 can of tomato paste
1 large onion of choice (I use Sweet Maui), diced
3-4 cloves of fresh garlic
1 packet of "hot" chili seasoning of choice (read labels, some contain wheat)
1/4 cup of red wine OR 2 TBSP of balsamic vinegar
2 Tbsp of Kerry Gold grass fed butter
1-2 Tbsp of EVOO (extra virgin olive oil)

Directions:

Heat up a tablespoon of olive oil in a pan and add your diced onion and cook on low to medium heat for 2 minutes, be sure to salt the onion upon adding to pan to help them sweat.  After 2 minutes add the garlic and cook one more minute, stirring constantly so they don't burn.

Add your can(s) of diced tomatoes to onion and garlic and heat on low.  You can add your chili seasoning at this stage.

In a separate pan, sauté your 2 pounds of organic grass fed ground beef.  Drain.

Once cooked, add meat to your tomato, onion, and garlic mixture.  Add your entire can of tomato paste and mix thoroughly.  Heat up the entire contents on low heat.  Add your butter and stir until melted.  Add your wine and take a swig for yourself, you've worked hard, you deserve it!

Once it's all mixed I taste it to make sure it has the flavor I want.  I will often even add one more tablespoon of extra virgin olive oil.  Remember, this is keto so don't fear fat!  Fat is our friend!  

Voila!

This chili had so much flavor and heat that I didn't need to add sour cream or cheese, or anything!  My husband did add cheese and he wasn't complaining, I assure you!  So feel free to add any of your favorite chili condiments, but stay clear of chips, remember, this is Keto!

Enjoy your keto chili and I hope this has been A Good Fit!
I would appreciate your sharing this recipe and post.


Friday, October 13, 2017


I love fat bombs!  Love them!  My go-to is Chocolate PB but sometimes you need to mix it up and I often get comments that someone doesn't like coconut oil, or chocolate. What?  Who doesn't love chocolate?  But they exist, so I set out to try new flavors.  

We love cheesecake in my family and since cream cheese is fat and peanut butter is fat, BAM, a perfect keto combination.  One thing I love about cheesecake is the graham cracker crust, but graham crackers aren't keto, AND I wasn't planning on baking this dessert, so I set out to make a crispy crust that was pure keto.  

This is an EASY recipe that can all be done on the stove top and with a food processor.  
Because I ended up with more batter than I expected, I decided that this is a better dessert than fat bomb.


Ready?  Here we go....

Lets begin with the cheesecake portion.  Here is a good visual for you.


Cheesecake Ingredients:

1- 8oz box of cream cheese (full fat version)
1 cup of Natural Peanut Butter (only peanuts and possibly salt as ingredients)
1/4 cup of Sour Cream (full fat version)
1/4 cup of Heavy Whipping Cream
3 TBSP of Agave/Stevia sweetener OR Stevia drops to taste

Directions:

Place cream cheese in saucepan and heat on Medium/Low until it starts to soften.  Add the sour cream and mix.  Add in the cream and keep mixing constantly so it doesn't burn or curdle.  Add the peanut butter and mix until fully incorporated.  Once you have a creamy mixture, add the Agave/Stevia Sweetener.  This part is customizable to your taste and how sweet you like it.  We don't like very sweet so 3 TBSP is enough for us.  Turn off heat once you have a creamy PB cheesecake mixture without lumps.

Still had some lumps so I kept mixing and heating before adding the PB.


Ok, now for the crust....

Here's a good visual.


Crust Ingredients:

1/3 cup of almond meal
1/2 cup of sliced almonds
2 TBSP of melted butter
1 TBSP of Agave/Stevia Sweetener

Directions:

Place all of the crust ingredients into a food processor and pulse until well mixed and pieces are small and uniform. If too dry, add 1/2-1 more TBSP of melted butter and repulse.  Then take a small ball of crust and press into the bottom of a cupcake liner in a cupcake pan.


Now it's time to add your cheesecake mixture which should fill 10 cupcake liners up to the rim.  
Now freeze.  No need to bake because there is no egg.  

Once frozen you can pull out the number you'd like to serve and keep them in the refrigerator.  Once thawed, I set them out 10-15 minutes prior to eating.  Top with homemade keto whipped cream.  

Easy!  Keto!  Delish!!!!!

I hope you like my keto dessert!  We love it!  It's not something we would eat everyday, but certainly in those times when you're craving something decadent but don't want to throw yourself out of ketosis.  SO not worth it!


If this recipe has been A Good Fit for you, please help me by sharing!


Monday, October 9, 2017

My Favorite Fat Bomb Recipe


Ok, bear with me, gang, because this post has two recipes in one but they're really easy and one is actually optional.

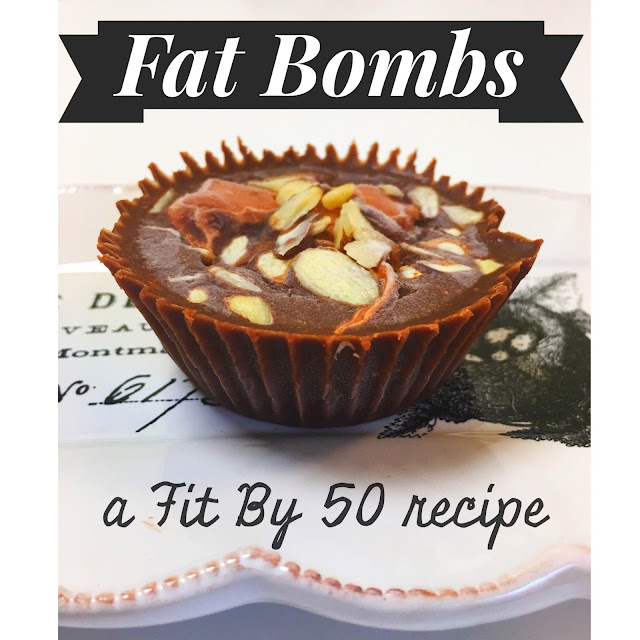
I'm asked weekly what a Fat Bomb is, and/or, for the recipe so I decided it's time to finally do a blog post.  In a nutshell, a Fat Bomb is a healthy, legal, Ketogenic version of a Reese's Peanut Butter Cup!  
And to expand, it's actually a small meal that can last two hours due to the high fat content, as opposed to a candy PB cup which spikes and then lowers your blood glucose levels.  

You can Google a myriad of fat bomb recipes, some fruity, some savory, but my husband and I love chocolate and peanut butter so this is our weekly go to.  Rob will have one every morning with his coffee while I prefer mine somewhere between lunch and dinner.  But whatever time of day you choose to indulge, this treat will easily buy you time until your next meal and tastes just like a cheat!

Before I get started on the recipe, a couple important key notes: keep them in the freezer!  Equally important, take one out of the freezer prior to indulging, but don't allow to thaw beyond 5-10 minutes or you could be eating it with a spoon.

I like to combine my ingredients in a saucepan over low heat to melt and incorporate all of the ingredients, but I've also cooked them in the microwave in a Pyrex and that works too.

Ok, ready????

Ingredients: (makes 9 fat bombs)

1/2 cup of solid coconut oil

1/2 cup of NATURAL Peanut Butter or Nut Butter of your choice
(natural nut butters contain nuts and possibly salt, NO other ingredients)

2-3 TBSP of Unsweetened cocoa powder

2 TBSP of Agave/Stevia 50/50 syrup
OR
Liquid Stevia drops to your level of preferred sweetness

also, IF you like texture, add:

1 TBSP of Chia Seeds (or)
2 TBSP of chopped/slivered nuts of choice (or)
Unsweetened coconut flakes (or)
Cacao Nibs

Ingredients for optional cream cheese filling:

1-8oz box of full fat cream cheese
2 TBSP of heavy whipping cream (I've even used 1/2&1/2)
1 TBSP of Agave/Stevia syrup
1 TBSP of Unsweetened cocoa powder

Directions:

Place the solid coconut oil and nut butter into saucepan and heat up on low until well blended.  Add the unsweetened cocoa powder and blend.  Add the agave/stevia syrup and blend.  Once blended, add your texture and mix until evenly distributed.
Using a spoon or ice cream scoop, pour mixture into 9 cupcake liners in a regular cupcake pan.  If you're not adding the cream cheese mixture, place in freezer for 2-3 hours and remember to take one out 5-10 minutes prior to eating.

BUT if you're adding the cream cheese mixture:

Take a new saucepan and melt the block of cream cheese.  As it starts to soften, add the heavy cream and mix well until you have a creamy mixture, no lumps.  You may even need to add a splash more of cream if mixture is too thick.  Next add your agave/stevia syrup and blend well.  Finally add your unsweetened cocoa powder.  The mixture should be the consistency of a pudding and will taste like  chocolate cheesecake.  Once thoroughly mixed, take a dollop and add to the center of each fat bomb. I like to sprinkle a little sliced almonds on top for added texture and presentation.

Place into freezer and freeze 2-3 hours.  Only remove from freezer upon eating, they will thaw in
 5-10 minutes.  

You really can't screw up this recipe.  It's totally customizable.  Need it sweeter? Add more Stevia and taste.  In fact, as long as you're tasting as you go along and like the taste, add or subtract what you want, BUT the ratio of solid coconut oil to nut butter should always be equal.

I can't wait to hear how you like them.  If you are a HUGE sweets or carb eater, these may taste bitter at first but many people have shared with me by the second or third day, they loved them and are now hooked.

Word of caution: this is a healthy and legal treat while doing a Keto diet.  If you are eating a traditional western diet of carbs and starches, this daily fat bomb can really pack on the calories, however, they're still much healthier than store-bought candy because at least you know what the ingredients are.

Please comment here and let me know how you like them.  Also, feel free to share this blog post with anyone you know doing a Keto diet OR who loves chocolate peanut butter cups!  

I appreciate your support and hope that this is A Good Fit


Wednesday, March 8, 2017

Jade Roller aka: Anti-Aging Jade Therapy

Do you roll?  I do.


I first learned about the jade roller about a year and a half ago when Cate Blanchett's makeup artist, Morag Ross, mentioned Cate's early morning makeup trailer regime for the film Carol.  Because of early morning call times in film, often an actress' face is still puffy.  You can't put Cate Blanchett on camera all puffy with pillow case creases on her face!  Heaven forbid.  So Morag would roll Cate's face prior to makeup application.  This sounded lovely to me so I invested in one ($24).

But first, a little history: Jade Rollers have been used for centuries by Chinese Empresses to refine and enhance skin elasticity.  Believed to have mystical powers, Jade is considered a symbol of beauty, grace and longevity.  This semiprecious stone has properties that allow it to remain cold on contact (even in warm weather).  This cooling effect helps to close pores, tighten skin and increase lymphatic drainage.  By stimulating meridians points, the Jade Roller promotes facial Chi (or Prana in India,  a life force or energy) for increased radiance and vitality.

Let me mention quickly about the benefits of lymphatic drainage (or lymphatic massage).  Our Lymphatic system is our defense against infection and disease, it's our body's second circulatory system.  Lymphatic massage is one of the best things you can do to help your body help itself.  

The lymphatic system has no "pump" of its own to move lymph through the system, as the circulatory system has the heart. Rather, bodily movement and breathing function to move liquid lymph through the vessels and filters of the lymph nodes. For people who get too little exercise and eat too much processed food, the lymphatic system can easily be overtaxed - resulting in a body that is susceptible to infection and disease. -Naturalnews.com

Lymphatic drainage massage is an easy home remedy with profound effects. According to a lymph system article (http://www.jonbarron.org/article/optimizing-your-lymph-system) by Jon Barron of the Baseline of Health Foundation, lymphatic massage can increase the volume of lymph flow by as much as 20 times, vastly increasing the system's ability to remove toxins and infectious materials. Studies have found lymphatic drainage massage to be a medically beneficial form of physical therapy for a range of lymphedema-related problems.


I'll I know is it works!  It feels so good in the morning and by keeping my roller in the refrigerator it quickly aids in depuffing my eyes.  Perks you up too!

Here are the benefits to the face:

  • Enhances skin elasticity, tightening and toning facial muscles
  • Helps refine pores
  • Reduces puffiness and dark circles around eyes
  • Helps relieve facial tension and discourages fine lines and wrinkles
  • Improves circulation and revitalizes oxygen flow
  • Aids in elimination of toxins, reducing stress and inflammation
  • Improves sinus conditions and congestion

While this won't take 10 years off your face, it might help you feel younger, and with daily use it will benefit your lymph system which as you've read above is proven to aid in health and beauty.  The number one thing I notice each day is it depuffs my eyes, it just does!  I love it!

Not all jade rollers are created equally and since I've researched this ad nauseam I'm providing a link for your convenience.  I trust Ginger Chi; they get great reviews in product and customer service AND a percentage of their sales are donated to women and the environment!  Win!


One last thing, and this is important.... in rolling, you add ZERO pressure.  You are not ironing out wrinkles here.  Pressing hard will not work or get you better results.  The weight of the jade stone does all the work for you, you simply just roll across your face.  Moving our lymphs fluids around, which sit directly under the skin, requires light touch.  Do we understand?  I know some of you women with scrubs, you think by scrubbing or rubbing hard you erase damage but you only hurt your skin.  Be gentle.  The skin on our face is delicate so your technique should be as well.  Still, I know someone out there will treat this like a steamroller.  Just stop!

Roll outwards, never inwards

Outward roll across upper eyelids and brow bone

Outward roll under the eye, never roll inward, pick up the roller then roll outward repeatedly


Rolling outward, are we sensing a message here?

And on forehead and cheeks and neck, roll UP only, never ever down

Love the two sides, the smaller for eyes and nose, the larger for forehead, cheeks and neck

It comes with this diagram and directions so it's fool proof!  Such a great roller.


I hope I've intrigued many of you.  I am not suggesting you all run out and buy a roller but I love the feeling and benefits of it each morning and thought you might too.  I hope this has been A Good Fit!

Please share or follow A Good Fit by adding your email up top.


Tuesday, February 21, 2017

Thai Shrimp Stir Fry on Riced Cauliflower {all ingredients from Trader Joes}

Have you ever been in a food rut?  I feel like I eat the same meals each week and while I enjoy them, and they keep me on track, I'm SO sick of chicken, pork, and beef!  Can I get an amen?

I set out to Trader Joe's yesterday to add more variety to my life.  When I lived in Southern California I was SO spoiled.  I had THREE Trader Joe's in my city and TWO Targets.  Now I live in a small, historic town in North Carolina and while we have better options than in previous years, my nearest Trader Joes' is still 45 minutes away (and Target is easily 30 minutes).

I had so much fun shopping at TJs and spent a small fortune but I brought home some ingredients I haven't used in years!  I whipped up a quick, and I mean QUICK dinner tonight and it was so good I licked the bowl clean.... for real!  I thought I'd share with all the busy gals out there.  This took maybe 10 minutes tops and tasted like Thai take-out.

Here are the main ingredients, there's only four, well five if you count cooking oil... OK, six if you count the sliced avocado I added last minute to my dish.

Wild Caught Argentinian Red Shrimp $9.99 for 20-25 large shrimp


Stir Fry Vegetables sold in the frozen section and Riced Cauliflower sold in produce.


Thai Green Curry Sauce (by the way, NOT Paleo but I didn't have time to create a Paleo version from scratch so I decided to use this and then recreate down the line, when I do, I'll post a Paleo version here.)


Step 1: thaw frozen shrimp.  I placed my shrimp in my refrigerator in the morning and by 5 pm they were still frozen.  Aim for the night before.  If they are still frozen, place in a strainer, place the strainer in a larger bowl, and fill with COLD water and let the faucet dribble cold water over them for about 15 minutes or until thaw.


Step 2: heat up oil of choice in a skillet.  I used sesame oil but avocado oil could work well, or grapeseed oil.  Once the oil is heated, cook shrimp for 2 minutes then flip onto the other side for another 2 minutes over medium heat.  Once cooked I let them sit on a plate until I need them.

Step 3: place Riced Cauliflower  in a bowl and toss with 1-2 TBSP of olive oil.  Cover the bowl with plastic wrap and microwave for 3 minutes.  There are many different ways to cook Riced Cauliflower but I've researched them all and the consensus is that the microwave version resembles rice the best.  I agree.  I've roasted, I've sautéed, but the microwaved tastes and feels most like real white rice.


Step 4: heat up another TBSP of oil in skillet and add and sauté the frozen stir fry vegetables for 4-6 minutes stirring often.  


Step 5: add the Thai Green Curry sauce to pan of veggies and add back in the shrimp.  Heat the ingredients together and place on a bed of the heated riced cauliflower.  You could add a sprig of fresh cilantro and some diced avocado to finish it off, adding even more YUM!


I realize that this isn't from scratch, though I'd love to make a Paleo version of the sauce, but it tasted like restaurant quality and took only 10 minutes.  Win!  And the entire dish cost maybe $16.  This could easily feed a family of four or double the ingredients for a larger family.  

I hope this helps a busy mom out there.  Thai flavors were a nice detour from all of my usuals.  I will definitely be making this again.  If I can create this green curry sauce from scratch then this entire meal can be Paleo, and I'll have to use different stir fry veggies as these have edamame which is also not Paleo.  


I hope this was A Good Fit for you!  Please share.  And let me know if you try this recipe.

Tuesday, February 14, 2017

Paleo Pancakes {gluten free/grain free}


Mmmmm, pancakes!  I make them often for my daughter but since going Paleo in December, and doing the Whole 30 in January, I have been grain free for sometime.  How I don't cave and eat a bite of her's each time is sheer willpower I tell you!  Well, actually I don't eat her's because I know it will inflame my body and I quite like how I feel each morning being grain-free, so that is the true reason I am not tempted, BUT, I have craved pancakes for sometime now, however,  which recipe to choose when there are SO  many on the internet and Pinterest?

I started with the easiest, the Two-Ingredient Paleo Pancake.  It's just a mashed ripe banana and 2 organic eggs.  Whip together and griddle them up.  They were ok, kind of eggy-crepey when I was really seeking fluffier.  After that I tried the same recipe but took advice from other Paleo chefs and added vanilla extract and baking powder!  Ah ha!  Baking powder should help them rise making them more fluffy!  Not so much though.  They were only marginally better than the first recipe.

Since I've been making pancakes for over 40 years, I figured it needed some sort of flour and fortunately I had almond flour and coconut flour on hand.  Almond flour is a little too heavy and moist so going with my gut I grabbed the coconut flour.  If you are not a coconut fan you will hate the smell of coconut flour but I promise it cooks out.  In no way did my pancakes taste like coconut.
I basically took the second recipe and added a couple tablespoons of coconut flour and a splash of almond milk and the results were exactly what I was looking for!  Yay!  Fluffy grain-free pancakes that pack a protein punch and don't leave me feeling bloated and/or tired as regular wheat pancakes do.

There is a trick though, you have to make them small, around 3" diameter, and cook them on Low to Medium heat for 2 minutes each side.  Top with Kerry Gold grass fed butter and REAL maple syrup and you have yourself an ingredient list you understand, with no preservatives and no added sugar.

This is only a 10" skillet so they are under 3-4" each.

Get them good and golden brown so you know they're cooked on the inside.  

I'm going to make some for my family this weekend as the true test.  I absolutely love these and will be making them 1-2 a week for myself!  


Here is the recipe for 2 servings, it'll make around 8 pancakes but remember they are small so you can easily eat 4 each!

Ingredients: 

2 very ripe bananas
4 organic large eggs
1/2 teaspoon Vanilla Extract
1/4 teaspoon baking powder
2-4 teaspoons of coconut flour (you decide on thickness but too much makes them fall apart)
Splash of almond milk, possibly 1 TBSP 

Recipe:

In a non-stick pan (non stick works best, trust me, these will stick to your cast iron) heat up desired cooking oil (avoiding all vegetable/canola oils, corn, or soy), I use coconut oil but it does have a coconut flavor so you could use Avocado Oil or Grapeseed Oil.

Mash your bananas really well with fork or potato masher.  Add your eggs and whisk.  Add vanilla extract and baking powder, whisk.  Then add 2 teaspoons of coconut flour and whisk adding more if you like thicker, fluffier pancakes, but not too much more or they fall apart upon flipping.  I then add a splash of almond milk, just a splash (1 TBSP tops) because I like this consistency.  Eyeball it.  If too thin, add more flour, if too thick, add more almond milk.  Batter should not be too runny and it will have some small banana chunks which you don't noticed once cooked.

In a heated skillet, add batter until it's about 2-3" diameter.  These can be tricky to flip so the smaller, the easier.  When I made mine too large they ripped all apart during the flip.  Heat 2-2.5 minutes on first side, lift edge up with thin spatula to see if they're golden brown, if so, flip and heat another 2 minutes on the other side.  I top with Kerry Gold butter as they're still cooking and heat up REAL maple syrup (ingredients should only say "maple syrup" and nothing else).  

Plate, pour, and eat!  These are SO good!  Four small pancakes equal one serving as you're only getting 1 banana, 2 eggs, and a smidge of coconut flour.  Maple syrup does contain natural sugars so if you're trying to lose weight, go lite on the pour or top with fresh fruit!

I absolutely love these and will be serving them this with weekend to my family, with a side of bacon of course!  I won't tell them they are Paleo as not to influence their thinking.  I promise to report back and let you know what they think.  And please let me know what YOU think too!  I always appreciate feedback!


Didn't feel like wearing makeup this morning hence the filter BUT see how thick and fluffy they are?  Perfection!

Thanks for reading!  I hope this has been A Good Fit!


Tuesday, January 31, 2017

Oat-less Oats (aka-when you are SICK TO DEATH of eggs on the Whole 30)

Don't gross out, I PROMISE these are so good!

I am on Day 29 of my Whole 30 plan and am pretty excited to wrap this up but while it is still fresh in my mind I'd love to introduce you to oat-less oats.  What, you say?  Why can't you have oats on the Whole 30, they are a proven healthy grain?  Glad you asked.  The Whole 30 is a total nutrition reset and one of the rules is to get off of ALL grains, ALL means ALL.  Studies show that grains cause inflammation so by cutting them all out for 30 days allows you to really listen to your body.  Then in the re-introduction stage, you can slowly add a grain at a time back in to examine how your body reacts.  If you experience any discomfort or bloating, after lets say the example "gluten", then you will know that gluten is not a good choice for you going forward.  

The first two weeks of Whole 30 are pretty easy, especially if you're an egg eater!  We are encouraged to have 2-3 eggs per day, including the yolk which I've thrown countless away in my egg-whites stage of life.  Sorry little yolk!  Who knew how completely healthy you were?  I digress.
I love, love, love eggs but by week three I was growing tired of them and thats when a childhood friend posted a link to this recipe.  I Googled Egg Banana Scramble and pages of recipes came up so I'm not giving any one person credit for this recipe; listed below will be my version even though I'm not a recipe creator but I'm a darn good embellisher!

Now don't gag, mixing mashed banana with scrambled eggs sounded hideous to me at first too and my family gags each time I make this, but it really does feel like real oatmeal and without an ounce of grain.  Ready for the ingredients and recipe?  Here you go:

Ingredients:

1/2 TBSP of coconut oil (or ghee, clarified butter)
1 ripe banana (the riper the better)
2 eggs
Almond Milk (without Carrageenan if on Whole 30) 
1/2 TBSP Chia Seeds
1/4 cup of fresh berries of choice
1 TBSP of chopped nuts (walnuts, pecans, you get it)

Instructions:

Melt your cooking fat in a pan over medium heat.  Add your banana and mash with a fork, hence the reason I listed "ripe", easier to mash. The banana will soften as you mash and cook.  

Next whisk 2 eggs in a bowl and pour into the pan with the mashed banana.  I like to lower heat at this point.  Cook as you would scramble eggs but, and this part is an important step, before the eggs set (not runny but not fully cooked) add in a splash of almond milk and add your chia seeds.  Cook until desired consistency.

Pour immediately into a bowl and add toppings of your choice plus a dash or two more of almond milk.  Mix it all up and dig in! 

*   *   *   *   *

Let me know if you try it.  My mom loved it and so did several people in my Whole 30 group.  It's SO good and I plan on making this even after my Whole 30 as I'm easing into a Paleo lifestyle. 

Please share with others, it helps me to grow my audience.  You can also add your email up top OR follow me on my Facebook Fit By 50 page where I discuss health and beauty tips! 


Thanks for reading; I hope it was A Good Fit!